Seed Starting Techniques: How to Wake Up a Seed
Quick Care Summary
A seed is a plant in suspended animation. Inside the seed coat sits a tiny embryonic plant, a packed lunch of starch or oil, and a set of biological locks that have evolved to keep it dormant until conditions are right. Seed starting is the craft of unlocking those locks at the right time, in the right order.
This guide covers what every seed needs, the techniques used to wake up the stubborn ones, and how to keep your seedlings alive after they sprout. It pairs with our companion piece, When to Start Seeds Indoors in Alberta, which tells you the timing for our zones.
What every seed needs
Three things are non-negotiable for any seed to germinate: water, oxygen, and the right temperature. Get these wrong and nothing else matters.
Water (imbibition)
The first step of germination is the seed absorbing water and swelling. This activates enzymes that begin breaking down the stored food and powering the embryo. The seed coat needs to be soft enough or thin enough for water to get in. If it isn't, you scarify (more on that below). The germination medium should be evenly damp, not soggy. A useful test: a handful of moist seed-starting mix, squeezed hard, should release one or two drops of water and then stop. If it pours, it's too wet.
Oxygen
Seeds breathe. The embryo metabolizes its food reserves aerobically, which means it needs air around the seed at all times. Waterlogged soil suffocates seeds before they can germinate. This is why well-drained seed-starting mix matters more than rich seed-starting mix. Mixes that hold too much water rot more seeds than they grow.
Temperature
Each species has an optimal soil temperature for germination. For most common vegetables, that's between 21 and 27°C (70 to 80°F). A few are warmer (peppers and eggplant want 27 to 32°C) and a few are cooler (lettuce, spinach, and many natives prefer 15 to 18°C and will refuse to germinate above 25°C). A seedling heat mat with a thermostat is the single best $40 a seed starter can spend.
Some seeds also need light
A handful of species require light to germinate, including lettuce, snapdragon, petunia, calibrachoa, columbine, foxglove, and some salvias. These are usually surface-sown (pressed onto the soil but not covered) and the tray is kept under bright light. The seed packet will say "do not cover" or "needs light to germinate." Most other seeds don't care or actively prefer darkness.
The seven techniques that get stubborn seeds going
Beyond water-oxygen-temperature, many wild and native seeds have additional dormancy mechanisms. These are six common techniques (plus a quality-check) for unlocking them.
1. Cold moist stratification
A pretend winter. Required by most Alberta native wildflower seeds, many tree and shrub seeds, and a long list of perennials (echinacea, milkweed, many lupines). The seeds need a period of cold, damp conditions before their internal chemistry will allow germination.
How to do it:
- Mix seeds with damp (not wet) vermiculite, sand, or paper towel.
- Seal in a labelled plastic bag or container.
- Refrigerate at 2 to 5°C (35 to 40°F, not the freezer).
- Wait 30 to 90 days, depending on species. Check the seed packet or the species profile.
- Sow when the time is up, or as soon as you see radicles emerging in the bag.
The simpler alternative for native seeds is fall sowing outdoors. The winter does the stratification for you. Sow into a prepared bed in October, mark the area, and watch in spring. This works for almost any cold-hardy native.
2. Warm-then-cold (double dormancy) stratification
A subset of native seeds require a warm period before the cold period. They include wild rose, hawthorn, false Solomon's seal, baneberry, and several Prunus species. The classic protocol is 60 to 90 days at room temperature in damp medium, then 90 to 120 days in the fridge. Two falls and a winter outdoors will also do it. Sow in summer and expect germination the following spring after that.
3. Scarification
Some seeds (lupines, sweet peas, morning glories, false indigo, leadplant, locust, hard-coated native legumes) have seed coats so tough that water can't get through. They evolved to be cracked by passing through animal digestive tracts, abraded by glacial sand, or scratched by frost. To do it manually:
- Mechanical: rub each seed once or twice across coarse sandpaper, or nick the seed coat with a sharp knife on the edge opposite the eye. You're trying to thin the coat, not destroy it.
- Hot water soak: drop seeds into water just off the boil (about 80°C) and let cool overnight. Use for many native legumes.
- Acid scarification: commercial growers use sulphuric acid for tough species. Don't try this at home.
A scarified seed will visibly swell within a few hours of soaking. If it doesn't, scarify again.
4. Soaking
For seeds that don't need scarification but benefit from accelerated water uptake. Beans, peas, beets, chard, parsley, parsnip, spinach, and corn often germinate faster after a 12 to 24 hour soak in room-temperature water. Don't soak longer, or oxygen-starved seeds rot. After soaking, sow immediately; soaked seeds should never be left to dry out again.
5. Paper towel pre-sprouting
A way to germinate seeds outside soil and transplant only the ones that worked. It saves time and tray space, and lets you see exactly what's happening. Especially useful for old seed of uncertain viability, expensive seeds, and slow germinators.
- Dampen a paper towel (or a coffee filter, which is more rot-resistant).
- Space seeds across half the towel and fold the other half over them.
- Slide into a Ziploc bag with the corner left open for airflow.
- Place in a warm, dark spot (21 to 27°C).
- Check daily. Once a white radicle emerges, gently transfer to soil with tweezers, radicle pointing down.
6. Winter sowing (the milk jug method)
A low-tech, low-effort technique perfect for cold-hardy seeds (most natives, many vegetables, perennials). You make miniature greenhouses out of empty translucent jugs and let the weather do the work. Brilliant for Alberta because the natural cold cycle handles the stratification automatically.
- Take a clean translucent 4 L milk jug, vinegar bottle, or salad clamshell.
- Punch four to six drainage holes in the bottom and a few air holes in the top half.
- Cut horizontally around the middle, leaving a 5 cm hinge so you can fold it open.
- Add 8 to 10 cm of damp seed-starting mix and sow seeds at the depth their packet specifies.
- Tape the jug shut, leave the cap off, label it, and set it outside in a sunny, sheltered spot in late January through March.
- Forget about it. Snow falls on it, melts through it, and the seeds germinate when they're ready, usually a few weeks later than the same seeds indoors but with stronger, sturdier seedlings.
- Open the jug on warm days once seedlings appear, water if the soil dries, and transplant out at the right time.
7. Viability testing (paper towel test)
Before committing tray space (or before you fall-sow a hundred precious native seeds), test viability. Place 10 seeds on damp paper towel, fold, bag, and keep at 21 to 27°C. After 7 to 14 days, count what germinated. Eight out of ten? Sow them. Two out of ten? Use four times the seed or buy fresh.
Setting up: the equipment that actually matters
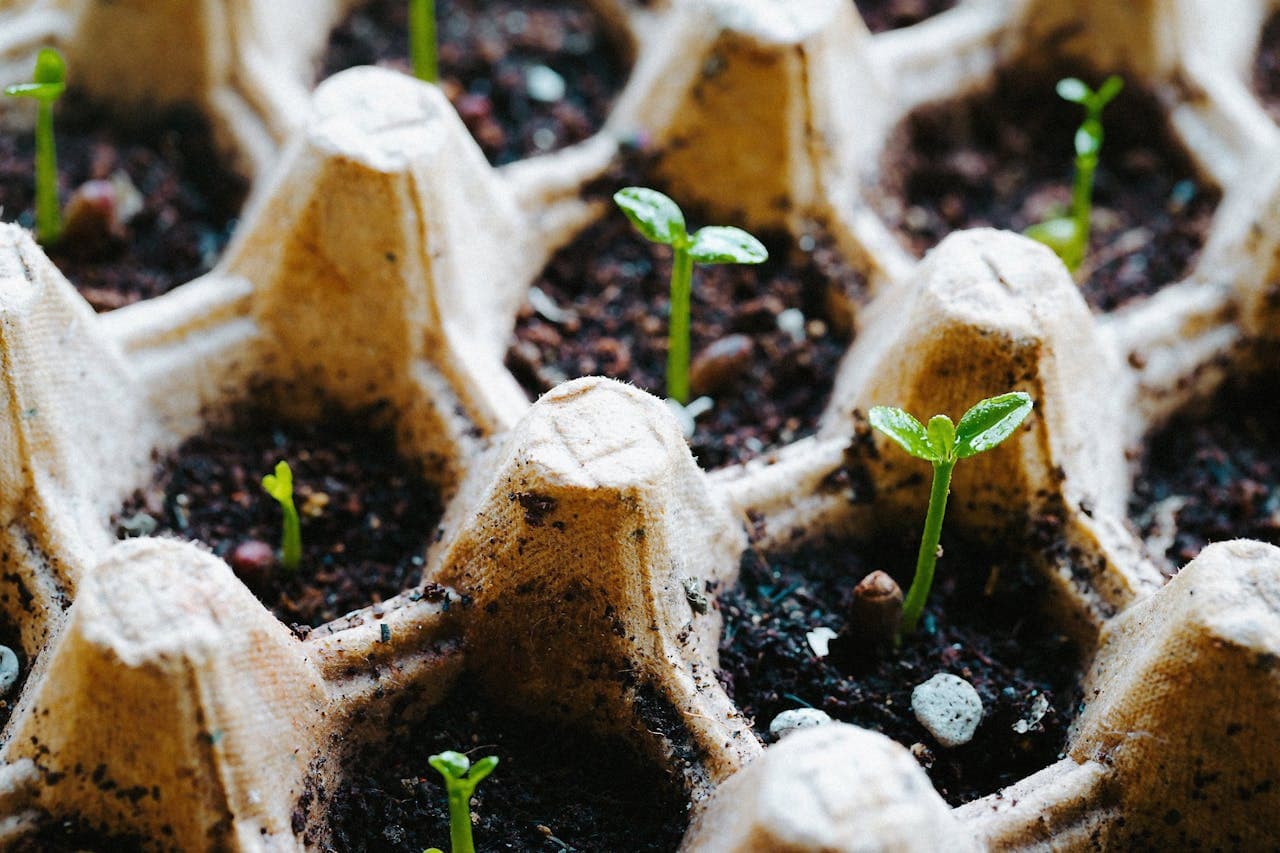
Containers
Almost anything with drainage works: cell flats (most efficient), recycled yogurt cups, paper-pot makers, soil blocks (zero plastic, zero transplant shock), or the milk jugs above. The non-negotiable is drainage holes. Rinse used containers in 10% bleach (1 part bleach, 9 parts water) for 30 minutes between uses to prevent damping off.
Seed starting mix (don't use garden soil or "potting soil")
Garden soil is too heavy and full of pathogens; bagged potting soil is too rich and stays too wet. A proper seed starting mix is light, sterile, and drains fast. A simple homemade mix is two parts peat or coco coir, one part perlite, one part vermiculite. Pre-moisten before sowing, since dry peat is hydrophobic and rolls water off the surface.
Light
Even a south-facing Edmonton window in February gives a fraction of what most seedlings need. Without enough light, seedlings stretch, fall over, and never recover. A basic full-spectrum LED grow light ($30 to $80) hung 15 to 25 cm above the seedlings, run 14 to 16 hours a day, produces stocky, dark-green plants. Raise the light as the seedlings grow to maintain that distance.
Heat mat
Most homes are around 18 to 20°C, which is below ideal germination temperature for warm-season crops. A seedling heat mat warms the soil 5 to 8°C above ambient and dramatically speeds and improves germination of peppers, tomatoes, eggplant, and basil. Crucially: remove the heat mat as soon as seedlings emerge. Warm soil after emergence is the perfect environment for damping off fungi.
Air movement
A small fan running on low for a few hours a day strengthens stems, prevents fungal disease, and produces sturdier transplants. Aim it across the trays, not directly at them.
Damping off: the silent killer
The most common cause of seedling death isn't bad luck. It's a soil-borne fungal disease called damping off, caused by Pythium, Fusarium, and Rhizoctonia species. Seedlings emerge looking fine, then fall over within 24 hours with a thin, water-soaked spot at the soil line. By the time you see it, the tray is usually a write-off.
Damping off thrives in wet, cool, stagnant, contaminated conditions. Prevent it with the opposite:
- Use sterile mix and clean containers. Never reuse used potting soil for seed starting.
- Don't overwater. Bottom-water (set the tray in a tray of water for 10 minutes, then drain) rather than top-water; surface dryness discourages fungus.
- Keep soil temperature in range. Cool soil after germination is the trigger. Use a heat mat to germinate, remove it after emergence, but keep ambient air at 18 to 22°C.
- Provide good airflow. A small fan, or just lifting any humidity dome 12 hours after the first sprouts emerge.
- Provide bright light. Strong light dries the soil surface and produces sturdier seedlings.
- Avoid over-fertilizing. Salt buildup stresses seedlings and feeds pathogens.
- Try a chamomile or cinnamon dust top-dressing. Both have mild antifungal properties; a thin layer of cinnamon over freshly sown seeds is a popular preventative with real evidence behind it.
From sprout to transplant
The day a seedling emerges is just the beginning. The next four to eight weeks decide whether it goes into the garden as a vigorous, hardened plant or a lanky shock victim.
The cotyledon-to-true-leaf transition
The first leaves a seedling produces are cotyledons, not true leaves. They're food storage organs that often look nothing like the adult plant. The first true leaves emerge above them and look species-typical. Until true leaves appear, the seedling is still living off seed reserves and shouldn't be fertilized.
First feed
Once two sets of true leaves are out, start feeding with a half-strength balanced liquid fertilizer (a 10-10-10 or fish emulsion at half the package rate) once a week. Seedlings in seed-starting mix have nothing to draw from once they outgrow their cotyledons.
Potting up
When roots fill the cell and start circling the bottom, the seedling has outgrown its starter container. Pot up to a slightly larger pot, like a 4-inch pot from a 6-cell. Don't go straight to a 1-gallon; oversized pots stay too wet for tiny root systems and invite damping off all over again.
Hardening off
Indoor seedlings have never felt wind, direct sun, or temperature swings. Moving them straight to the garden kills many of them. Spend 7 to 10 days hardening off:
- Day 1 to 2: 1 to 2 hours outside in a sheltered shady spot.
- Day 3 to 4: 3 to 4 hours, with some morning sun.
- Day 5 to 7: most of the day outside, full sun, brought in overnight.
- Day 8 to 10: out day and night in the final spot, if nighttime temps are above 10°C.
- Transplant on an overcast day if you can. Water deeply, and provide a few days of shade if the sun is intense.
Quick-reference table: technique by seed type
| Seed type / example | Technique |
|---|---|
| Tomato, pepper, eggplant, basil | Bottom heat, cover, no special prep |
| Lettuce, snapdragon, petunia | Surface-sow, light required, do not cover |
| Bean, pea, beet, parsley, parsnip | 12 to 24 hour soak before sowing |
| Lupine, sweet pea, morning glory, native legumes | Scarify (sandpaper or hot water), then soak |
| Echinacea, milkweed, columbine, blanket flower | Cold moist stratification, 30 to 60 days |
| Wild rose, hawthorn, false Solomon’s seal | Warm-then-cold (double) stratification |
| Most Alberta natives | Fall-sow outdoors OR winter-sow in milk jugs |
| Old or expensive seed | Paper-towel pre-sprout to confirm viability |
A short troubleshooting list
- Seeds didn’t germinate at all. Most likely: too cold, too dry, too old, or buried too deep. The general rule is to sow at a depth of two to three times the seed’s diameter; tiny seeds barely covered.
- Leggy, pale seedlings. Not enough light. Move closer to the grow light, raise the light if it’s too far, and run it 14 to 16 hours a day.
- Seedlings flopped overnight. Damping off. Pull the dead ones, increase airflow, let the surface dry, and dust survivors with cinnamon. Future trays: sterile mix, clean pots, less water.
- White fuzz on the soil. Saprophytic mould, mostly harmless but a sign of too-wet soil and not enough air. Scrape it off, increase airflow, water less.
- Yellowing seedlings. Hungry. Start feeding with diluted liquid fertilizer once true leaves appear.
- Purple-tinged stems and leaves. Phosphorus uptake issue, usually triggered by cold soil. Warm the room, ease off the water, and feed a balanced liquid fertilizer once temps recover.
The mindset that makes seed starters good
Pay attention. A seed tray rewards short, frequent visits more than long, occasional ones. Notice the moisture line on the soil edge. Notice when the cotyledons unfold. Notice the seedling that's stretching toward the window. Most failures aren't bad seed or bad soil. They're a small problem caught two days too late.
And keep a seed-starting log. Date sown, technique used, days to germination, percent germinated, transplant date, eventual yield. After two seasons it becomes the most accurate seed-starting calendar you'll ever own, for your specific home, your light, your zone.
Sources
- Prairie Nursery: Seed Stratification Explained
- American Meadows: How to Cold Stratify Seeds
- American Meadows: How to Scarify and Soak Seeds
- Missouri Botanical Garden: Native Seed Propagation Methods
- UMN Extension: How to Prevent Seedling Damping Off
- The Old Farmer’s Almanac: Winter Sowing in Milk Jugs
- Empress of Dirt: Paper Towel Seed Germination Test
Found this useful? Share it with someone who'd enjoy it.
Want to learn more?
Explore more plant care guides or find a nursery near you.
More plant care guides
Newsletter — early list
Get on the early list
We're putting together a slow, seasonal newsletter for prairie plant lovers. Drop your email and we'll send the first issue when it goes out. No filler, easy out.
Get on the list